이전에 Java Processing Library을 통해 오목게임을 개발한 적이 있습니다.
소켓 통신을 이용한 오목 게임
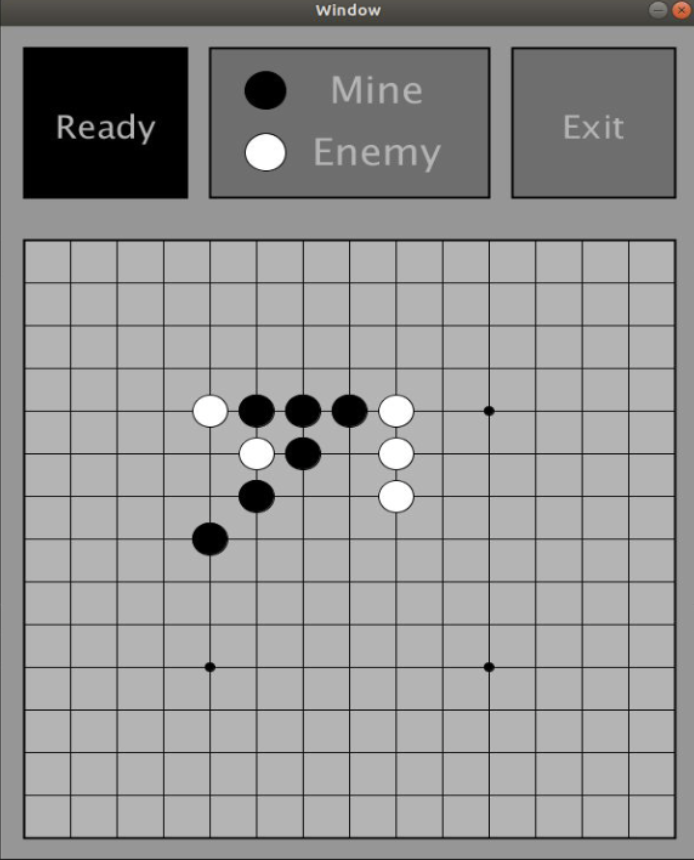
- 소켓 통신을 이용한 오목게임입니다. 따라서 클라이언트가 서버에 데이터 전달을 할 수 있는 것처럼, 서버도 클라이언트에게 요청없이 데이터 전달을 할 수 있습니다.
- 따로 server api가 존재하지 않습니다. 따라서 보낼 데이터에 대해 타입(ex. 사용자가 게임을 할 준비가 되었다는 값은 ReadyData 값으로 정의했고, 사용자가 둔 바둑돌의 위치는 StoneLocation이라고 정의했습니다)으로 규정한 것을 해당 타입이 어떤 타입인지 Protocol이라는 클래스로 구현해 한번 더 wrapping 하였습니다.
Ready에 대한 Model인 ReadyData
public class ReadyData {
    public static int READY = 1;
    public static int NOT_READY = 2;

    private int readyNum;

    public ReadyData(int readyNum) {
        this.readyNum = readyNum;
    }

    public int getReadyNum() {
        return readyNum;
    }
}
Stone에 대한 Model인 StoneLocation
public class StoneLocation {
    private int row;
    private int col;
    private int color;

    public StoneLocation(int row, int col, int color) {
        this.row = row;
        this.col = col;
        this.color = color;
    }

    public int getRow() {
        return row;
    }

    public int getCol() {
        return col;
    }

    public int getColor() {
        return color;
    }
}
위에 모델들을 한번 wrapping 하는 Protocol 모델
public class Protocol {
    private String data;
    private String type;

    public Protocol(String data, String type) {
        this.data = data;
        this.type = type;
    }

    public String getData() {
        return data;
    }

    public String getType() {
        return type;
    }
}
JSON
Gson 사용해서 json 데이터를 서버에 보내기
private void sendLocation(int row, int col) {
    StoneLocation location = new StoneLocation(row, col, myColor);
    Gson gson = new Gson();

    String data = gson.toJson(location);
    String type = ConstantProtocol.STONE_LOCATION;

    sendToServer(data, type);
    System.out.println("row:" + row);
    System.out.println("col:" + col);
}
private void sendToServer(String data, String type) {
try {
OutputStream os = socket.getOutputStream();
DataOutputStream dos = new DataOutputStream(os);
Gson gson = new Gson();
Protocol protocol = new Protocol(data, type);
String json = gson.toJson(protocol);
int len = json.length();
dos.writeInt(len);
os.write(json.getBytes());
} catch (IOException e) {
e.printStackTrace();
}
}- 처음에는 Gson이라는 라이브러리를 통해 데이터값들을 json 으로 바꿔 클라이언트와 서버가 정보를 서로 주고 받도록 했습니다.
Protocol Buffers(= protobuf)
그리고 이후에 json 대신 Google에서 만든 protobuf라는 것으로 데이터 형식을 바꿔보았습니다.
따로 작성해야 하는 proto 파일
message StoneLocation {
  int32 row = 1;
  int32 col = 2;
  int32 color = 3;
}

message Protocol {
  bytes data = 1;
  bytes type = 2;
}
protobuf로 서버에 데이터 보내기
private void sendLocation(int row, int col) {
    Protos.StoneLocation location = Protos.StoneLocation.newBuilder()
            .setRow(row)
            .setCol(col)
            .setColor(myColor)
            .build();
    ConstantsProto.ConstantProtocol type = ConstantsProto.ConstantProtocol
            .newBuilder()
            .setType(ConstantsProto.ConstantProtocol.Type.STONE_LOCATION)
            .build();

    sendToServer(location.toByteString(), type.toByteString());

    System.out.println("row:" + row);
    System.out.println("col:" + col);
}
private void sendToServer(ByteString data, ByteString type) {
try {
OutputStream os = socket.getOutputStream();
DataOutputStream dos = new DataOutputStream(os);
Protos.Protocol protocol = Protos.Protocol
.newBuilder()
.setData(data)
.setType(type)
.build();
byte[] bytes = protocol.toByteArray();
int len = bytes.length;
dos.writeInt(len);
os.write(bytes, 0, len);
} catch (IOException e) {
e.printStackTrace();
}
}- Gson 라이브러리로 따른 조치없이 동적으로 json으로 뽑아내어서 보낼수 있는것과 달리 protobuf를 사용하려면 .proto 파일을 미리 작성해야 하고, protocol buffers compiler로 컴파일해야 합니다.
- 하지만 이진 데이터라 데이터 용량 자체가 가벼워서 통신이 빨라집니다.